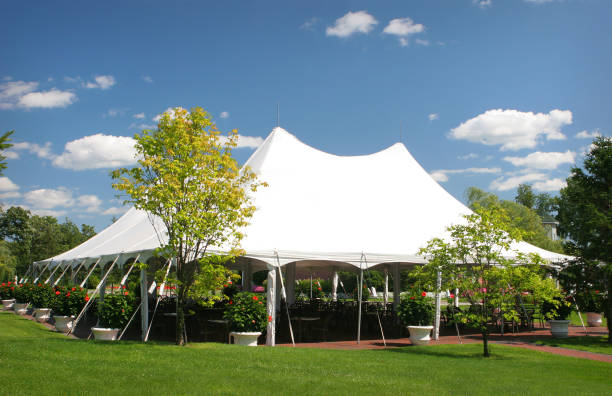
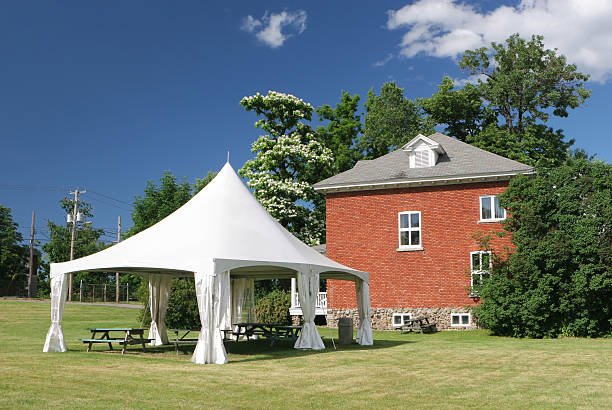
A canopy tent is a convenient shelter for backyard gatherings, festivals, markets, camping trips, and more. While setting up a large canopy solo can seem daunting, it’s quite feasible with the right techniques and preparation. Follow this comprehensive guide to smoothly put up any size canopy by yourself.
Preparation Tips for One-Person Setup
Setting up a canopy single-handedly does require some planning and preparation. Keep these tips in mind:
- Choose the right canopy size – Consider your planned uses and ability to maneuver it alone. 10×10 ft is a common solo-friendly size.
- Read instructions thoroughly – Review the steps and safety guidelines in your canopy manual.
- Assess the terrain – Set up on flat, stable ground without overhead obstacles.
- Gather required tools – Have needed items like mallets and rope stakes ready.
- Time it strategically – Avoid very windy conditions that can complicate setup.
- Weight anchors down – Have weights or sandbags ready to tie down the legs.
- Clear setup area – Remove obstructions from the spot where the canopy will be erected.
- Recruit help if needed – For very large canopies or tricky sites, having an extra set of hands can be useful.
Planning and preparation will make the process move smoothly and prevent injuries or damage.

Canopy Components to Know
Before setting up the canopy, take time to become familiar with the key components and terminology for the parts. This will help the instructions make sense. The main elements typically include:
- Cover – The fabric roof section that provides shelter
- Legs – The poles, rods, or bars that hold up the canopy
- Trusses – The triangular supports along the roof structure
- Spreader bars – Long bars connecting the tops of the legs on each side
- Rafter hooks – Connectors that attach the cover fabric to the frame
- Stakes and ropes – For securing the legs and anchoring the tent
- Storage bag – Carries the disassembled canopy parts
Knowing canopy anatomy will make assembly much easier.
Step-by-Step Canopy Setup Guide
Now let’s walk through the canopy setup process from start to finish:
1. Layout the Frame Parts
- Remove all rods, legs, spreader bars, and hardware from carry bag
- Sort and lay out all parts neatly on the ground
2. Assemble the Roof Frame
- Connect the spreader bars to the legs
- Lock connectors and inserts into place
- Attach corner rafters and insert truss support bars
- Lock all joints securely
3. Get the Canopy Frame Upright
- Carefully lift the assembled frame off the ground
- Keep the frame square and centered as you lift it up
- Use your body weight and leverage to get it upright
- Have someone hold the frame or prop it against a wall if needed
4. Secure the Legs
- With the frame upright, position the legs properly for the width
- Insert corner leg anchors into the ground
- Hammer stakes completely into the soil if needed
- Adjust spreader bars to balance and square frame
5. Drape the Canopy Cover Over the Frame
- Place folded cover on top of upright frame
- Unfold and spread the cover out fully over the frame
- Align the cover completely and pull the corners down
6. Secure the Fabric Cover
- Attach hooks or loops on the inside of the cover to the rafters
- Work around the perimeter to attach it securely
- Pull the fabric taut corner-to-corner
- Tie excess strap webbing as needed for a tidy look
7. Anchor Down the Canopy
- Weigh down each corner with sandbags or weights
- Tie anchor ropes from the top of each leg around the stake
- Secure side flaps to legs with ropes if needed
- Re-check that the frame is square and the cover is taut
With proper preparation and following these key steps, you can safely set up a canopy solo in just about any location.

Tips for Solo Setup
- Prop legs up on blocks as you connect spreader bars
- Keep the frame low to the ground initially to maneuver it
- Lift one side at a time instead of all corners together
- Attach just a few tie-down points then re-square and do the rest
- Face the wind and pull cover over that direction first if windy
- Roll-up flaps and vents are not being used to tidy appearance
Taking Down and Packing the Canopy
When it’s time to take down the canopy, follow these simple steps:
- Untie all anchoring ropes and weights
- Detach cover hooks from rafters around the perimeter
- Lift the cover off the frame and fold or roll it up neatly
- Remove corner leg stakes and lower frame to the ground
- Disconnect truss bars and corner rafter sections
- Unlock spreader bars from legs
- Disassemble all parts and clean the frame
- Place all components into the carry bag
- Store the bag in a protected, dry area
It takes less than 15 minutes to take down and pack a canopy with practice. Make sure to dry out any wet canopy parts fully before long-term storage.
Canopy Size and Weight Comparison
Larger and heavier-duty canopies may require 2+ people for setup. This table compares sizes, weight, and difficulty level:
| Size | Leg # | Weight | Difficulty |
|---|---|---|---|
| 6×6 ft | 4 | 25-40 lbs | 1 person |
| 8×8 ft | 4 | 30-50 lbs | 1 person |
| 10×10 ft | 4 | 40-75 lbs | 1-2 people |
| 10×20 ft | 6 | 80-120 lbs | 2+ people |
| 20×20 ft | 8 | 120-180 lbs | 2+ people |
Canopies larger than 10×10 are challenging for one person to maneuver. For big events or high winds, having assistance is recommended.
Canopy Style and Feature Options
When selecting a canopy, consider which features will be most useful for the intended applications:
- Leg style – Adjustable, straight, or angled; consider height and stability needs
- Portability – Carry bags and wheeled options for easy transport
- Mobility – Casters allow rolling into place
- Walls and screens – Customize the amount of airflow and visibility
- Windows and doors – Allow access when walls are installed
- Lighting – Integrated lighting systems for evening functions
- Color and graphics – Choose neutral or vibrant colors; customize with logos
- Water resistance – Waterproof fabric for very wet conditions
Choose the most practical canopy features based on planned usage, duration of setup, portability needs, and versatility preferences.
Recommended Accessories
Some handy accessories make canopy setup and use easier:
- Rope or ratchet straps – Extra lines for staking and tying down
- Sandbags or weights – Provide anchoring without stakes
- Mallet or sledgehammer – Drive stakes into hard ground
- Power drill – Make staking quicker and easier
- Tarps or flooring – Create a clean covered floor area
- Fans or heaters – Add temperature control
- Storage bag – Protect canopy when in transit or storage
- Sidewalls – Offer more interior space and protection
- Cleaning tools – Brushes, sponges, detergent to wash off cover and frame
Investing in key accessories pays off through easier solo setup, added convenience, and extending canopy lifespan.
Safety Precautions When Setting Up Your Canopy Tent
Since installing a canopy involves heavy lifting and equipment, some safety precautions should be taken:
- Always follow the manufacturer’s instructions
- Check for overhead wires before lifting
- Clear areas of trip hazards and obstructions
- The team lifts very large or heavy components
- Use proper lifting technique to avoid back strain
- Wear gloves for grip and hand protection
- Anchor securely to prevent tipping or collapse
- Stop work immediately in severe winds
Setting up a canopy without injury or incident requires awareness, preparation, caution, and common sense. Never rush the process or compromise stability just to finish faster. Safety first.
Frequently Asked Questions about Canopy Set-Up
Having trouble getting your canopy set up smoothly? Here are answers to some common canopy questions.
How do I get the canopy cover on by myself?
Lay the cover out flat behind the frame. Pull it over the top by grabbing the fabric at opposite corners. Give yourself some slack rather than pulling it taut initially. Then work around attaching ties and tightening.
What kind of rope is best for securing a canopy?
Nylon or polypropylene ropes are durable, weather-resistant, and hold knots well. Choose at least 1/4 in thick rope and sturdy stakes. Bungee cords can also be used for extra wind resistance.
What is the easiest way to anchor a canopy?
Sandbags or purpose-built canopy weights placed on each corner are the quickest solo anchoring solution. No staking required! Just tie corner tie-downs to the weights.
How can I set up a canopy on concrete or asphalt?
Without the ability to stake into the soil, tie each corner to an object that can’t shift or slide away like vehicles, storage containers, or street signs.
Should sidewalls be installed before or after the top?
Install the sidewalls after getting the roof frame upright and anchored. It’s much easier to work around the bottom securing them than reaching over the top later.
How do I prevent canopy fabric sagging?
Sagging occurs when the fabric isn’t pulled tightly enough over the frame. Recheck tie-downs and corner angles. Retighten straps as needed. A few strategic interior ties can also minimize mid-span sagging.
What’s the best way to clean canopy fabric?
Mix mild soap with warm water in a bucket. Use a soft brush and sponge to scrub stains. Rinse off with plain water, allow to fully dry, then roll up the canopy.
How can I make taking down the canopy easier?
The process goes quicker with 2 people. Remove all weights, stakes, and tie-downs first so the frame is free to collapse. Then disconnect trusses, spreaders, and rafters.
My Final Thoughts
Setting up a canopy tent solo may seem like a challenge, but is quite feasible with preparation and some technique. Choose the right size canopy for one person handling. Assess the site conditions in advance and gather needed tools and anchors. Maintain safety by following instructions and lifting carefully.


