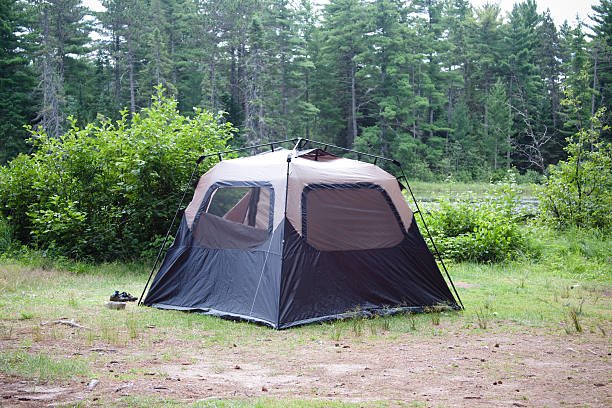
Setting up a tent can be daunting, especially if you’re a beginner camper. However, with the right instructions and a little bit of practice, you’ll be able to set up your Coleman tent like a pro. In this article, we’ll guide you through the entire process, from choosing the right tent to packing it up after your camping trip.
Choosing the Right Tent
Before you start setting up your tent, you need to make sure that you have the right one for your needs. Coleman offers a wide range of tents, from small backpacking tents to large family tents. Here are some things to consider when choosing a Coleman tent:
Capacity: How many people will be sleeping in the tent? Coleman tents are available in different sizes, from two-person tents to ten-person tents.
Tent Type: Do you need a dome tent, a cabin tent, or a screen tent? Each type has its own advantages and disadvantages.
Seasonality: Will you be camping in warm weather or cold weather? Coleman offers three-season and four-season tents, with the latter being better suited for colder temperatures.
Features: Do you need a tent with a vestibule, a screened porch, or a built-in lighting system? Coleman offers a variety of features to choose from.
Once you’ve chosen the right tent, it’s time to start setting it up.
Setting Up Your Coleman Tent
Before you start setting up your tent, make sure that you have a flat, level surface to work on. This will ensure that your tent is stable and won’t collapse in the middle of the night.
Unpacking and Laying Out the Tent
- Carefully remove the tent from its carrying bag and lay it out on the ground.
- Identify the different parts of the tent, such as the rainfly, the tent body, the poles, and the stakes.
Assembling the Poles
- Coleman tents typically use a combination of shock-corded and color-coded poles.
- Start by assembling the main tent poles, making sure that they’re fully extended and locked in place.
Setting Up the Tent Body
- Locate the tent body and spread it out on the ground, with the door facing the desired direction.
- Insert the main tent poles into the corresponding sleeves or clips on the tent body.
- Once the main poles are in place, lift the tent body and attach the remaining poles or clips.
Attaching the Rainfly
- Locate the rainfly and drape it over the tent body, making sure that the door and vents are aligned.
- Attach the rainfly to the tent body using the provided clips, hooks, or loops.
- Adjust the rainfly to ensure that it’s taut and that there are no sagging areas.
Staking Down the Tent
- Using the provided tent stakes, secure the tent to the ground by inserting the stakes through the loops or grommet s on the tent body and rainfly.
- Make sure that the stakes are driven into the ground at an angle, providing maximum stability.

Adjusting the Tent
- Once the tent is staked down, make any necessary adjustments to ensure that it’s level and taut.
- Use the provided guy lines to secure the tent in windy conditions.
And that’s it! You’ve successfully set up your Coleman tent. Now, you can start enjoying your camping trip.
Packing Up Your Coleman Tent
When it’s time to head home, you’ll need to pack up your tent. Here’s how to do it:
Removing the Stakes
- Carefully remove the tent stakes from the ground, making sure not to damage them.
Removing the Rainfly
- Detach the rainfly from the tent body and fold it up neatly.
Disassembling the Poles
- Remove the poles from the tent body and disassemble them, making sure to store them in a way that prevents them from getting tangled.
Folding the Tent Body
- Fold the tent body in half, then in thirds, until it’s compact and easy to store.
Packing the Tent
- Place the folded tent body, rainfly, poles, and stakes back into the carrying bag, making sure that everything is secure and won’t shift around.
And that’s it! You’ve successfully packed up your Coleman tent, and you’re ready to head home after a fun-filled camping trip.

Tent Setup and Takedown Steps
| Tent Setup Steps | Tent Takedown Steps |
|---|---|
| 1. Unpack and lay out the tent | 1. Remove stakes |
| 2. Assemble the poles | 2. Remove rainfly |
| 3. Set up the tent body | 3. Disassemble poles |
| 4. Attach the rainfly | 4. Fold tent body |
| 5. Stake down the tent | 5. Pack tent into bag |
| 6. Adjust the tent |
FAQs About Coleman Tent
How do I know if my Coleman tent is the right size?
Coleman tents are available in a variety of sizes, ranging from two-person tents to ten-person tents. To determine the right size, consider the number of people who will be sleeping in the tent, as well as the amount of gear you’ll be bringing. It’s generally a good idea to choose a tent that’s slightly larger than you think you’ll need to ensure that you have enough space to move around and store your gear.
Can I set up a Coleman tent by myself?
Yes, most Coleman tents are designed to be set up by a single person. However, it’s always easier to have an extra set of hands, especially when it comes to tasks like staking down the tent or attaching the rainfly.
How do I properly stake down my Coleman tent?
Proper staking is crucial for ensuring that your tent stays secure and stable, even in windy conditions. When staking down your tent, make sure to drive the stakes into the ground at an angle, rather than straight down. This will provide better stability and prevent the stakes from being pulled out of the ground. Additionally, use all of the stake-out points on your tent to ensure maximum stability.
How do I keep my Coleman tent dry during rain?
To keep your Coleman tent dry during rain, make sure that the rainfly is properly attached and adjusted. The rainfly should be taut and should extend all the way to the ground, with no gaps or sagging areas. Additionally, make sure that the tent is properly staked down and that the guy lines are in use to prevent the tent from collapsing in high winds.
How do I ventilate my Coleman tent?
Most Coleman tents come equipped with vents or mesh panels to allow for proper ventilation. To maximize airflow, make sure that these vents are fully opened and unobstructed. Additionally, you can prop open the tent door or rainfly to allow for additional airflow.
How do I properly store my Coleman tent?
Proper storage is essential for ensuring that your Coleman tent remains in good condition and lasts for many camping trips to come. When storing your tent, make sure that it’s completely dry and free of any dirt or debris. Fold the tent body and rainfly neatly and store them in the provided carrying bag. Store the tent in a cool, dry place, and avoid exposing it to direct sunlight or extreme temperatures.
Can I use a Coleman tent in cold weather?
While most Coleman tents are designed for three-season use (spring, summer, and fall), the company does offer four-season tents that are suitable for cold weather camping. These tents are typically more rugged and feature additional insulation and weatherproofing to protect against snow, wind, and freezing temperatures.
How do I repair a damaged Coleman tent?
If your Coleman tent becomes damaged, you may be able to repair it using a tent repair kit or by contacting Coleman customer service for replacement parts. Common repairs include patching holes or tears in the tent body or rainfly, replacing broken poles or stakes, and repairing zippers or other hardware.
Closing Words
Setting up a Coleman tent may seem daunting at first, but with a little practice and patience, it can become a simple and enjoyable task. By following the steps outlined in this guide, you’ll be able to set up your tent quickly and efficiently, ensuring that you have a comfortable and secure shelter for your camping adventures. Remember to choose the right tent for your needs, properly stake it down, and take care when packing it up to ensure that it lasts for many camping trips to come.